Weaving with two or more colors is a great way to enhance and enliven your weaving. Though it’s annoying to weave in ends, I find it’s worth the effort because it’s fun to use two colors and the results are often beautiful. (I developed a method of working in ends as I go—see links at the bottom of this post).
By accident I discovered that changing colors on different layers makes a pattern look different. It can change a blah pattern into something spectacular. Case in point:
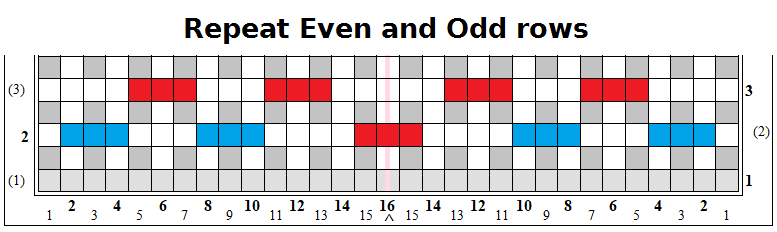
“Diamonds Stitch” (See Glossary for explanation of abbreviations)