I didn’t photograph the process because I didn’t think of writing it up till after I was all done.
The problem was, I’d completed a 6″ square and removed it from the loom before I realized my mistake.

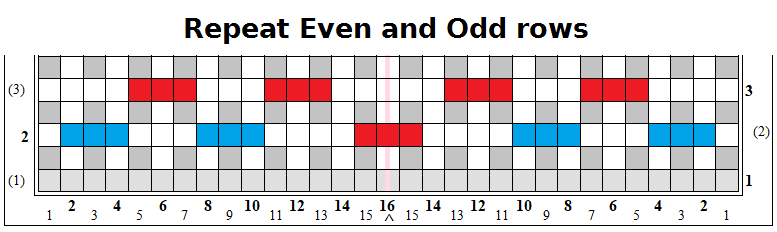
The red circle shows the part of the pattern I’d left out. That corner was plain woven before the square went back on the loom.