
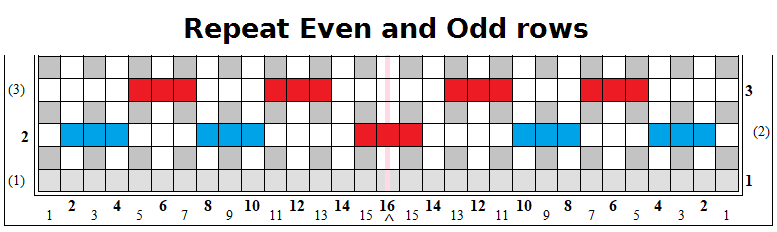
First of all—and this is easy to overlook; I often make the l-to-r mistake when I forget to pay attention to what I’m doing—READ ROW INSTRUCTIONS LEFT-TO-RIGHT ON EVEN ROWS, RIGHT-TO-LEFT ON ODD ROWS.
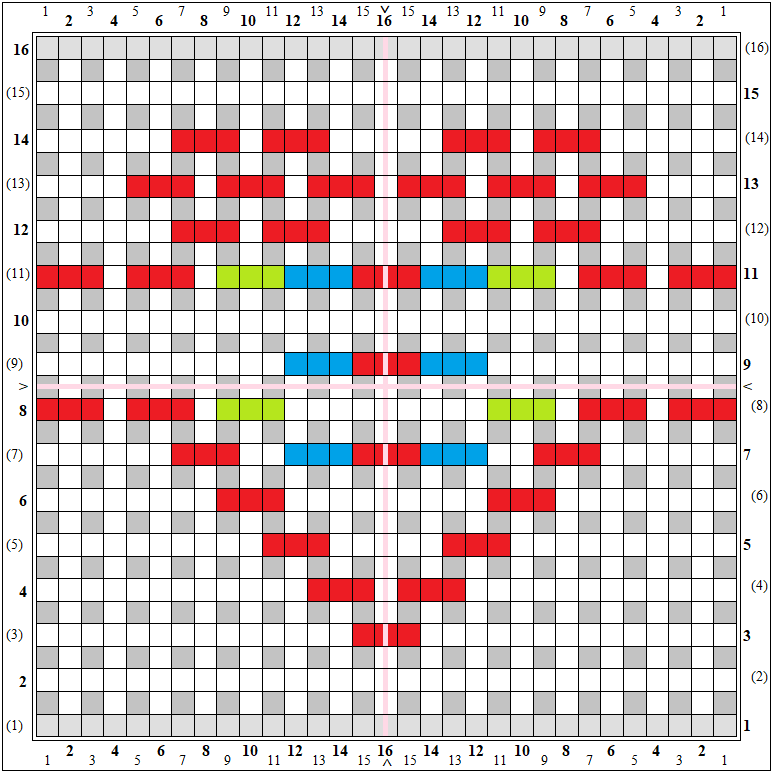
These colors usually appear only on three-layer warp (3LW) patterns:
Red = UNDER
Blue = OVER
White or Gray = PLAIN weave
Green = optional Under
Light Blue = optional Over — not used very often
Here are some examples:
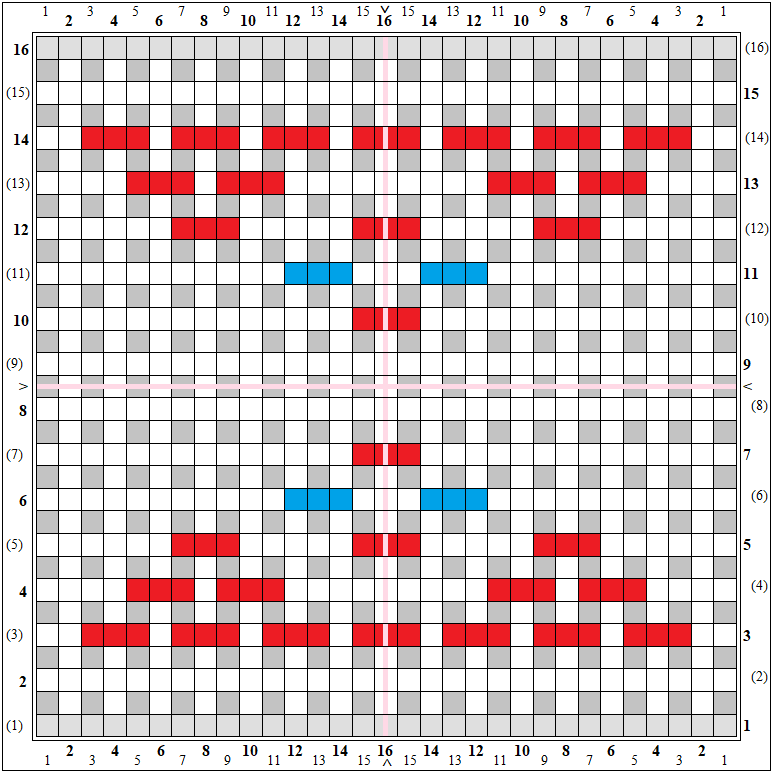
Star Valley
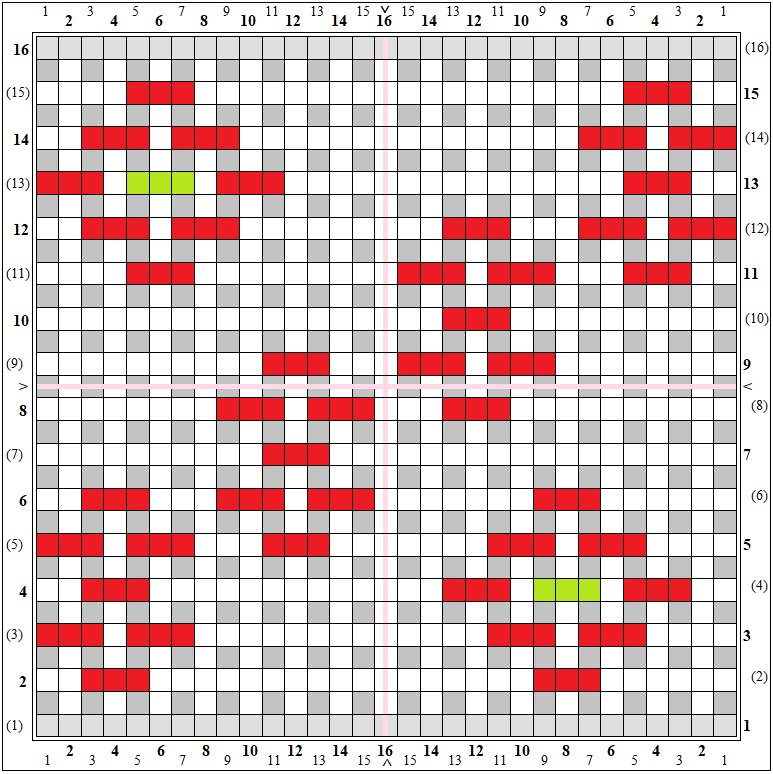
Berries with 2 Diamonds
Diamonds Stitch 2
Heart Band Bar X variation
*****************************************
These colors usually appear only on two-layer warp (2LW) patterns:
Red or Pink= UNDER
Blue or Light Blue or White = OVER
Lavender = optional Over or Under — not used very often
Here is an example:
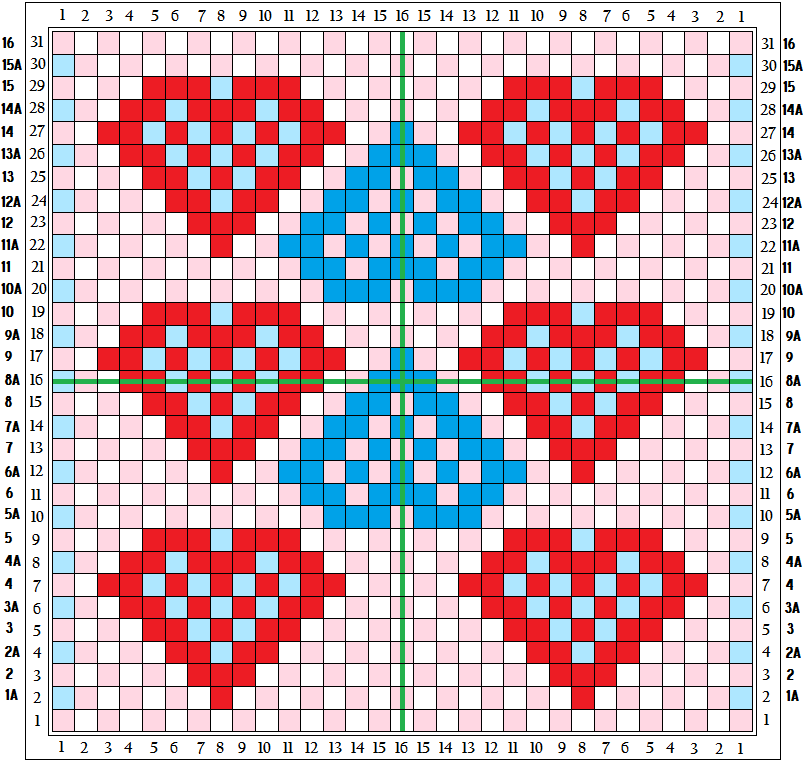
Heart Columns with reverse
I use red or blue to indicate when more than one warp is skipped; pink and light blue indicate plain weave stitches within the pattern. Because I paint each square individually when designing my patterns, I don’t always fill in all the squares, thus white squares indicate plain weave Over stitches.
*****************************************
The following illustration explains the numbers across the top and bottom of the chart.
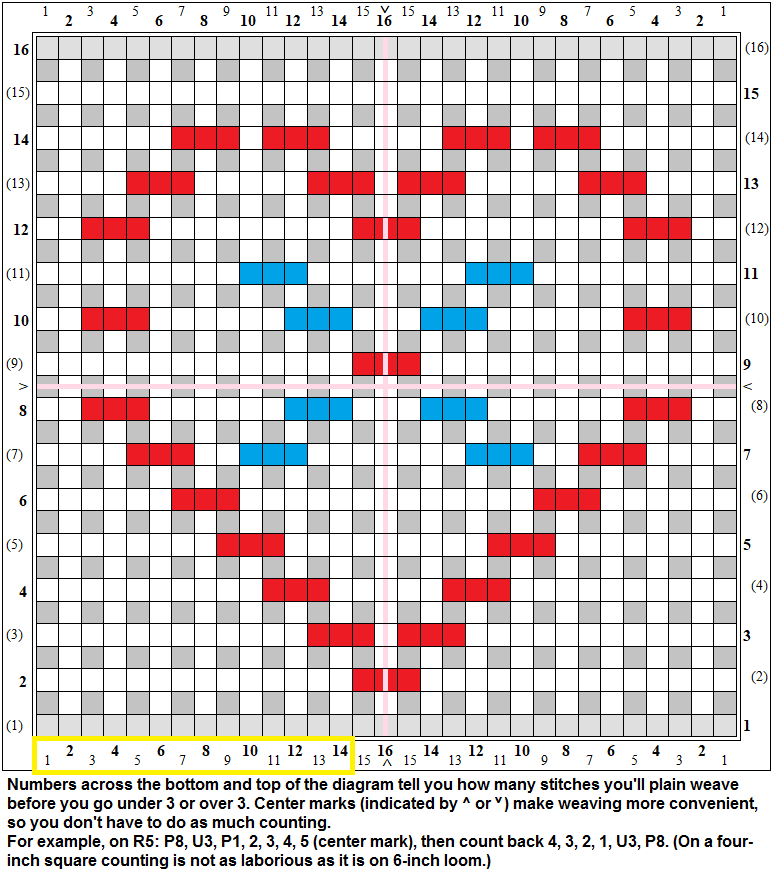
Cross My Heart 3
Aloha, I just started working on a zoom loom. I love that it has patterns and would start learning how to do this. I have a 4 shaft weaving loom but it is not portable. I am looking forward working more on this. Mahalo!
Hi! Sorry it took me so long to reply to your comment. My two blogs suffered a break-in and I was FLOODED with comments from bizarre to profane. I got a bit nervous even with comments that sounded legitimate.
I hope my blog helps you as learn to use a pin loom. You may also want to consult the Facebook Pin Loom Weaving Support Group if you use Facebook and like to socialize.